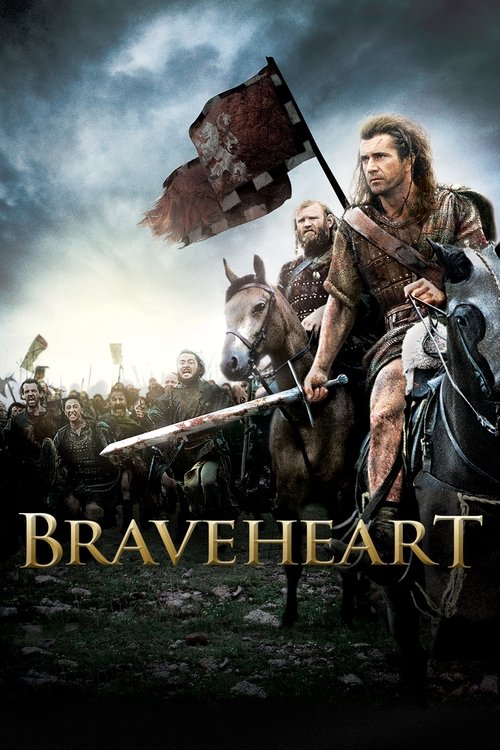
Braveheart
Enraged at the slaughter of Murron, his new bride and childhood love, Scottish warrior William Wallace slays a platoon of the local English lord's soldiers. This leads the village to revolt and, eventually, the entire country to rise up against English rule.
Dialogues from Movie Braveheart
The Speech at Stirling, Reelive

The Charges at York, Reelive
The Betrayal of Longshanks, Reelive

Wallace Declares War, Reelive
The Love between Wallace and Murron, Reelive
The Death of Murron, Reelive
The Confession Scene, Reelive
Wallace's Last Stand, Reelive
The Power of Brotherhood, Reelive
The Moment of Choice, Reelive
The Gathering Forces, Reelive
The Cry for Justice, Reelive
Moments of Reflection, Reelive
The Rallying Call, Reelive
The Death of a Leader, Reelive
Planning the Next Move, Reelive
The Burden of Authority, Reelive
The Voices of the Fallen, Reelive
Quotes from Movie Braveheart

They may take our lives, but they'll never take our freedom!
William Wallace
Braveheart, Reelive
Every man dies, not every man truly lives.
William Wallace
Braveheart, Reelive
I am William Wallace. And I see a whole army of my countrymen here in defiance of tyranny.
William Wallace
Braveheart, Reelive
Your heart is free. Have the courage to follow it.
Murron MacClannough
Braveheart, Reelive
Fight and you may die. Run, and you'll live—at least a while. And dying in your beds many years from now, would you be willing to trade all the days from this day to that for one chance, just one chance, to come back here and tell our enemies that they may take our lives, but they'll never take our freedom!
William Wallace
Braveheart, Reelive
The trouble with Scotland is that it's full of Scots.
King Edward I
Braveheart, Reelive
I will not be defeated. I will not be controlled.
William Wallace
Braveheart, Reelive
Aye, fight and you may die. Run, and you'll live.
William Wallace
Braveheart, Reelive
We all know that our cause is just.
William Wallace
Braveheart, Reelive
There is a difference between a man who is alive and one who has lived.
William Wallace
Braveheart, Reelive
Murron, your courage is the light that guides me.
William Wallace
Braveheart, Reelive
You can take our lives, but you can never take our spirit.
William Wallace
Braveheart, Reelive
You think the people of this country exist to provide you with position? I think you are mistaken.
William Wallace
Braveheart, Reelive
They may kill me, but they can never kill my dream.
William Wallace
Braveheart, Reelive
We fight for justice, for our children, for love, and for freedom.
William Wallace
Braveheart, Reelive
If you can see the world as it is, then you know that it is no longer a world without fear.
William Wallace
Braveheart, Reelive
What will you do with my freedom? Will you give it back?
William Wallace
Braveheart, Reelive
Your sorrow is not a weight, but a freedom, and we all carry that burden.
William Wallace
Braveheart, Reelive
A man’s reach should exceed his grasp.
William Wallace
Braveheart, Reelive
I feel like I've betrayed my people...
William Wallace
Braveheart, Reelive
Never underestimate the power of the human spirit.
William Wallace
Braveheart, Reelive
Tyranny is always defeated by the spirit of the people.
William Wallace
Braveheart, Reelive
We are not here to ask for justice. We are here to take it.
William Wallace
Braveheart, Reelive
Let them come; I welcome them.
William Wallace
Braveheart, ReeliveSound Tracks from Braveheart by James Horner
For the Love of a Princess
For the Love of a Princess by James Horner, Romantic scenes between William Wallace and Murron
Freedom
Freedom by James Horner, William Wallace's speech before the final battle
Scottish Theme
Scottish Theme by James Horner, Various emotional moments throughout the film
Download App
Memorable Scenes from Movie Braveheart
William's Childhood
William Wallace, as a young boy, witnesses the brutal execution of his father and uncle by the English. This moment shapes his desire for freedom and plants the seeds of his future rebellion. The scene is filled with tension as he hides and watches helplessly, showcasing the cruelty of English rule.
Context: The chilling introduction to the violence of English oppression sets the tone for William’s journey, emphasizing his motivation for fighting against tyranny.
The Return to Scotland
Years later, William returns to his homeland after being raised in secret. As he walks through a vast, beautiful landscape, nostalgia hits him. His heart is heavy with memories of lost friends and family, and he feels both a sense of belonging and sorrow.
Context: This scene illustrates the deep connection William has with Scotland, highlighting his longing for peace in a land marred by conflict.
Murron’s Death
In a heartbreaking moment, Murron is captured and killed by the English soldiers. William finds her lifeless body and is overwhelmed with grief and anger. This pivotal scene is an emotional catalyst that reignites his passion for rebellion.
Context: Murron's death represents the personal cost of war for William, emphasizing the stakes not just for him, but for all Scots subjected to oppression.
The Gathering of the Clans
William rallies various Scottish clans to unite against the English. The tension is palpable as different leaders initially refuse to join forces, displaying their doubts. William’s passionate speech inspires them, awakening a sense of hope and duty.
Context: This moment is key in demonstrating William’s ability to inspire others and the importance of unity in the face of tyrannical rule.
The Battle of Stirling Bridge
During this epic battle, William leads his troops with strategic genius, utilizing the landscape to their advantage. The clash is fierce, and ultimately, they achieve a stunning victory. The scene is a visual masterpiece, filled with chaos and heroism.
Context: This battle symbolizes the turning point in the fight for Scottish independence, demonstrating their courage and determination to resist English dominance.
The Speech before the Battle
William delivers his iconic speech to his troops, rallying them with heartfelt words about freedom and fighting for their future. His passion and conviction resonate deeply, motivating the warriors to face nearly certain death.
Context: This moment captures the essence of William’s character as a leader and a symbol of hope, further cementing the theme of freedom.
The Betrayal of the Scots
As the Scots celebrate victory, they are betrayed by some of their own who fear the retribution of the English. The subsequent events lead to tragic consequences. This betrayal hits hard, as trust is shattered among allies.
Context: The betrayal emphasizes the fragility of unity in rebellion and deepens the emotional stakes for William and his cause.
Robert the Bruce’s Choice
In a pivotal moment, Robert the Bruce faces a choice between loyalty to his father’s legacy or supporting William. He ultimately chooses to ally with William, understanding the importance of fighting for freedom over personal ambitions.
Context: This moment highlights the internal conflict many face during war: loyalty versus the greater good, enriching both characters’ arcs.
The Torture of William
William is captured and tortured by the English. Despite the agony he endures, he remains defiant, uttering the famous phrase, 'They may take our lives, but they will never take our freedom!' His spirit does not break.
Context: This harrowing scene illustrates William’s unwavering commitment to his cause and underscores the cost of freedom and sacrifice.
The Death of William Wallace
In his final moments, William faces execution bravely, encouraging others to continue the fight for freedom. His last words inspire the crowd, turning his tragic death into a rallying cry for generations.
Context: This powerful conclusion marks the ultimate sacrifice for the cause of liberty, encapsulating the film's central theme of fighting against oppression.
The Dream of Freedom
In a poignant moment, William dreams about being with Murron in a peaceful world. This scene is filled with serene imagery, contrasting the harsh reality he faces. It conveys his desire for a free Scotland.
Context: This scene serves as a reflection of William’s motivations, reminding the audience of what is truly at stake.
The Scottish Clans’ Reunion
After William’s execution, the clans convene, moved by their shared grief and commitment to fight. They resolve to honor his legacy by uniting and continuing the struggle for independence.
Context: This reunion emphasizes the impact of William's sacrifice and reinforces the theme of unity in the face of tyranny.
The Legacy of Wallace
In the climactic final moments, we see the future that William dreamed of beginning to take shape in Scotland. The film closes with images of a free Scotland set to stirring music.
Context: This ending encapsulates the message that true heroism inspires change and paves the way for future generations.
The Realization of Freedom
After intense battles, the Scots finally capture a fortress, marking a significant victory. The joy and relief among the soldiers is palpable, reinforcing their hope for a free future.
Context: This moment symbolizes a small but critical step toward achieving their ultimate goal, showcasing the power of resilience.
The First Meeting with Murron
William meets Murron as children in a tender moment filled with innocence and playful banter. This scene establishes their bond and foreshadows the central romantic element of the story.
Context: This moment lays the groundwork for the emotional stakes, reminding viewers of the love that fuels William's fight.
The Betrayal by Longshanks
King Edward Longshanks reveals his ruthless nature as he orders his men to take extreme measures against the Scots. The chilling dialogue emphasizes his tyrannical rule and sets the stage for conflict.
Context: This moment introduces the antagonist clearly, framing Longshanks as the embodiment of oppression and evil in the story.
The Night before Battle
Before heading into battle, the soldiers prepare and share personal stories. This quiet moment of camaraderie allows viewers to empathize with their fears and hopes.
Context: This humanizes the soldiers, reminding the audience that behind every warrior is a person fighting for their loved ones.
Meeting with the French Princess
William meets Princess Isabelle, who is both intrigued and sympathetic to his cause. Their conversation hints at a deeper alliance and shows the blossoming of a new relationship.
Context: This subplot adds complexity to William’s character and introduces themes of love and political maneuvering.
The Surrender of the English
After a fierce fight, the English are forced to surrender. The sight of their defeat is glorious for the Scots, but this victory comes with a heavy price.
Context: This scene resonates with the audience, as it evokes mixed emotions of triumph and sacrifice.
Murron’s Memory
William visits Murron’s grave, pouring his heart out using beautiful and touching dialogue that reflects his love and determination to keep fighting for their shared dream.
Context: This scene deepens the emotional impact by grounding William’s fight in personal losses and reminding viewers of what he has sacrificed.
The Moment of Decision
William stands at a crossroad, contemplating the path to take after Murron’s death. He decides to rise up, marking his transformation from a man seeking peace to a revolutionary.
Context: This serenity leading to a fierce decision marks a crucial turning point in his character arc.
Seeing the Tragedy of War
Amid the chaos of battle, William witnesses the loss and suffering on both sides, which brings a moment of reflection. Though it fuels his fire, it also shows him the brutality of war.
Context: This scene explores the theme that freedom often comes at a significant cost, making it more poignant.
The Call to Arms
In a rousing speech, William calls on Scots to join his rebellion. With passionate fervor, he taps into their desire for freedom, creating a collective vision for the future.
Context: This moment sparks the movement, emphasizing William’s role as a leader capable of uniting his people.
The Final Image of Hope
The film concludes with scenes of Scottish forces rising up, the landscape transforming into the promise of a free country under their control. A sense of peace and hope fills the air.
Context: This message of hope and renewal ties back into the film’s overarching theme of freedom and the indomitable spirit of the oppressed.
Download App